Creating your own homemade vanilla paste recipe is not only rewarding but also cost-effective compared to store-bought alternatives. This concentrated vanilla flavor enhancer combines the richness of vanilla bean seeds with the convenience of a ready-to-use paste. Whether you’re an avid baker or simply love the complex flavor of real vanilla, this DIY vanilla bean paste will elevate your desserts, beverages, and even savory dishes with its authentic taste and aromatic properties. Follow this straightforward guide to craft your own premium vanilla paste at home with just a few quality ingredients.
What is Vanilla Bean Paste?
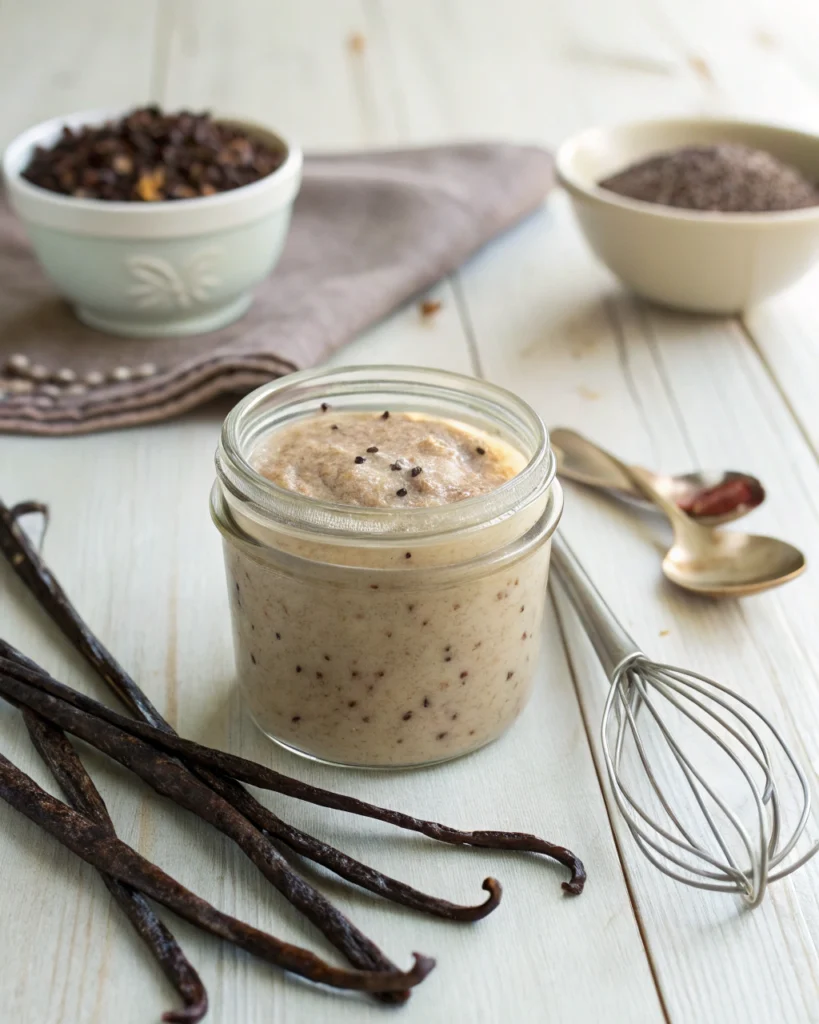
Vanilla bean paste is a thick, concentrated form of vanilla extract that contains visible vanilla bean seeds suspended in a syrupy base. It offers the convenience of vanilla extract with the visual appeal and intense flavor of whole vanilla beans. This homemade version combines the best of both worlds at a fraction of the cost of commercial products.
Vanilla Extract vs Vanilla Paste
While both provide vanilla flavor, they differ significantly:
- Texture: Vanilla extract is liquid, while vanilla paste is thick and syrupy.
- Appearance: Vanilla paste contains visible bean specks, adding aesthetic appeal to light-colored desserts.
- Flavor intensity: Vanilla paste typically delivers a more concentrated flavor per teaspoon.
- Usage ratio: You can substitute them 1:1 in most recipes.
Vanilla Paste Health Benefits
Beyond its delicious flavor, vanilla offers several potential health benefits:
- Contains antioxidants that help fight free radicals
- May have anti-inflammatory properties
- Contains small amounts of B-vitamins and minerals
- Provides a natural alternative to artificial flavorings
Ingredients
For this homemade vanilla paste recipe, you’ll need:
- 5-6 whole vanilla beans (preferably Madagascar or Tahitian)
- 1/2 cup pure vanilla extract
- 1/3 cup granulated sugar or light corn syrup
- 1 tablespoon water
Equipment Needed
- Small saucepan
- Sharp knife
- Cutting board
- Wooden spoon or heat-resistant spatula
- Glass jar with tight-fitting lid for storage
- Funnel (optional)
- Measuring cups and spoons
Step 1
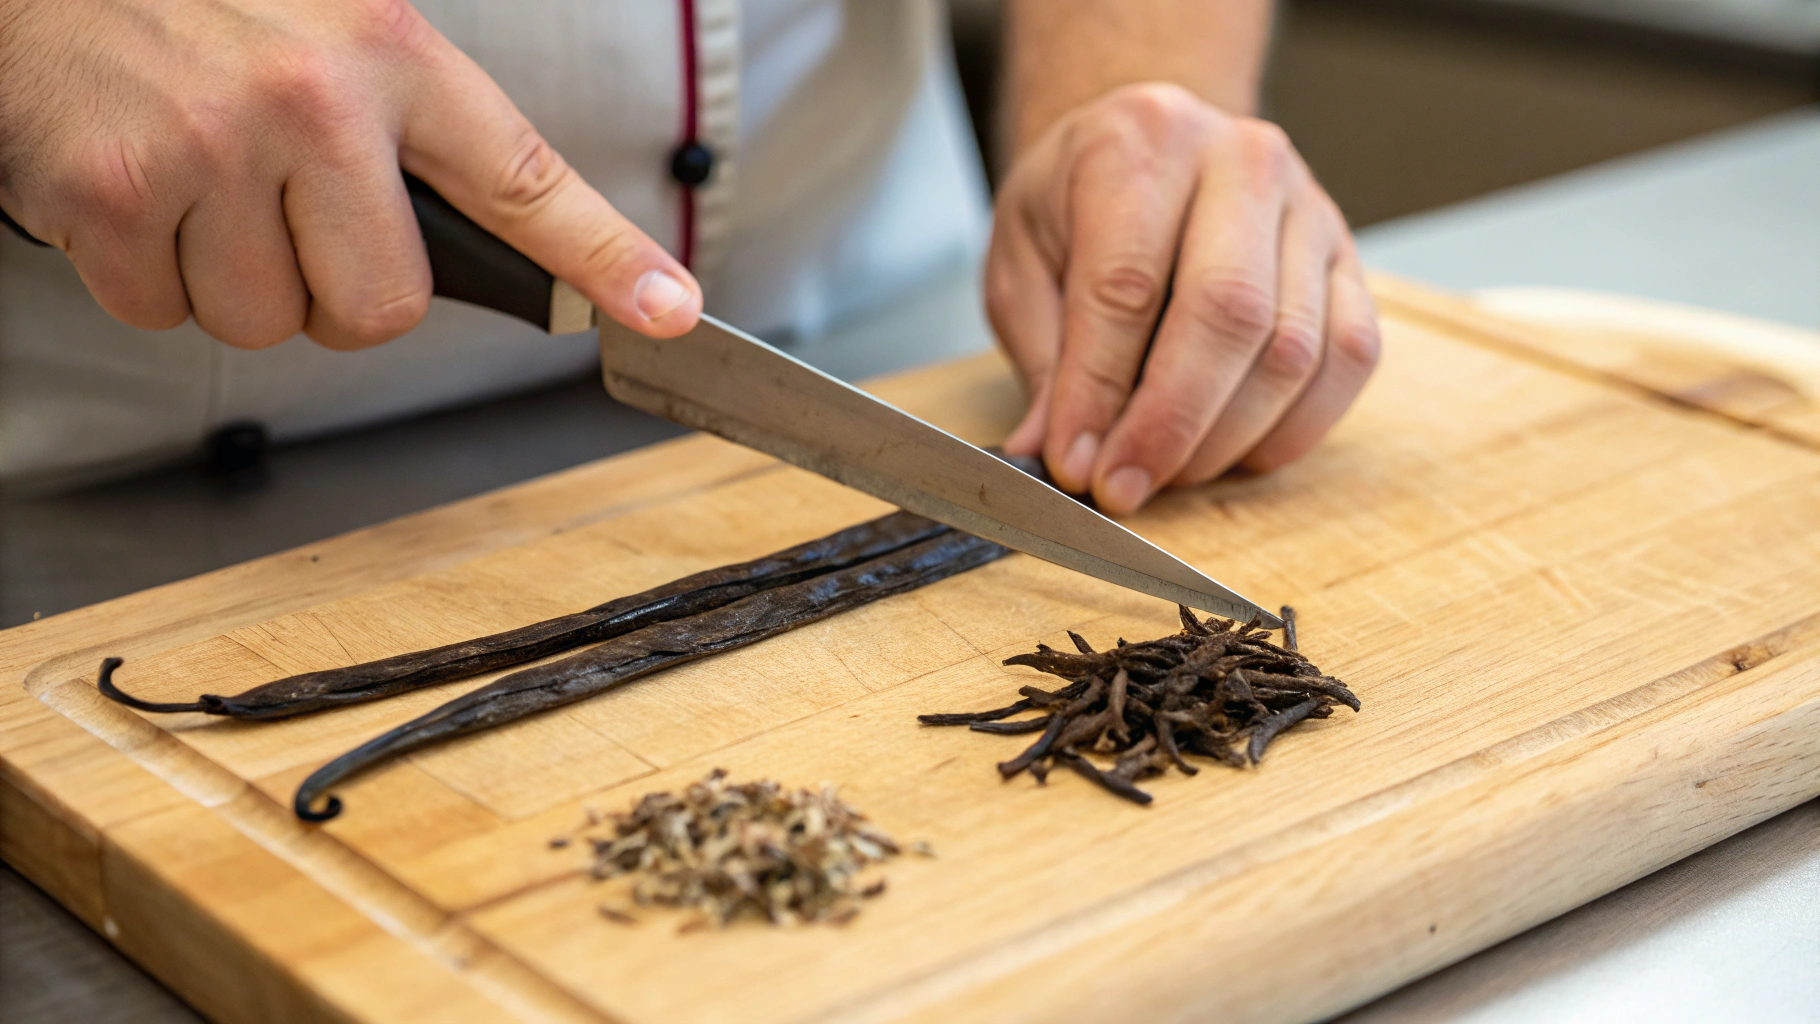
Prepare the Vanilla Beans
Lay each vanilla bean flat on a cutting board. Using a sharp knife, carefully split each bean lengthwise to expose the tiny seeds inside. Don’t discard any part of the bean – both the seeds and pod contain valuable flavor. Using the back of your knife, scrape along the inside of each split pod to collect all the seeds. Set aside both the scraped seeds and the empty pods – we’ll use both!
Tip: Choose plump, moist vanilla beans for the best flavor. If your beans seem dry, you can soak them in warm (not hot) water for 10-15 minutes before splitting.
Step 2: Combine Ingredients
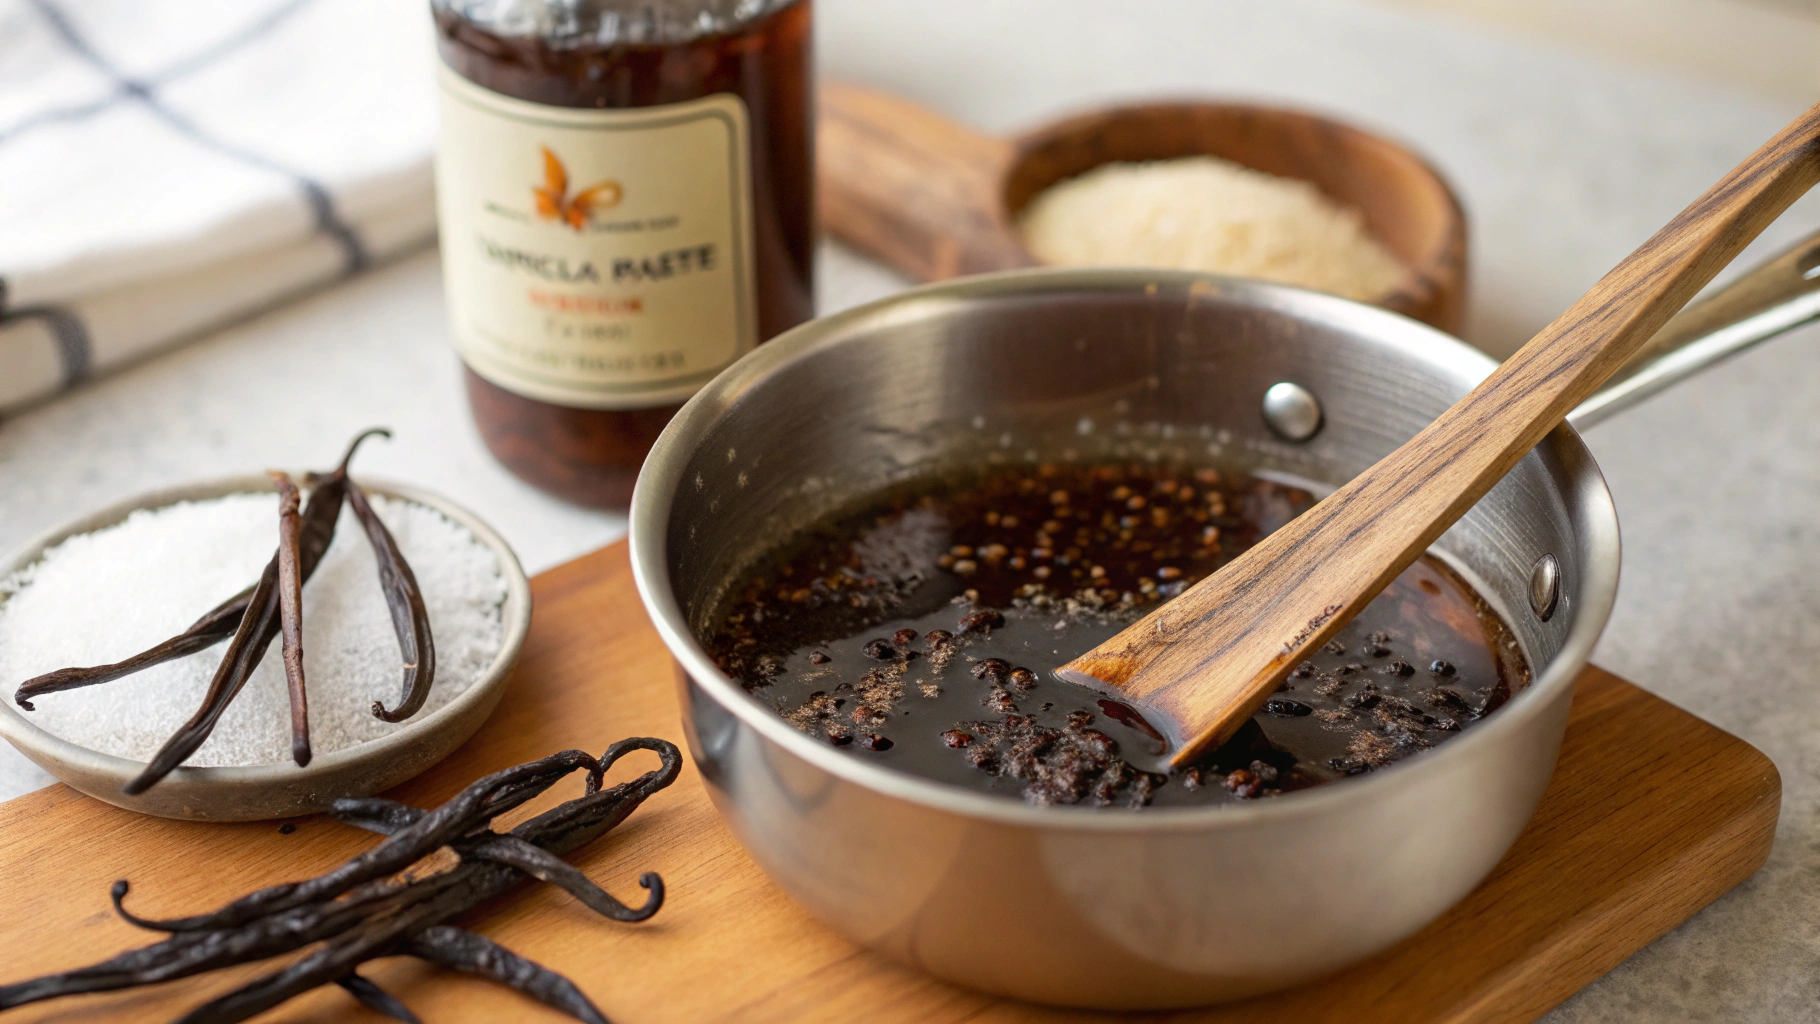
Combine Ingredients
In a small saucepan, combine the vanilla extract, sugar (or corn syrup), and water. Add both the scraped vanilla seeds and the empty pods to the mixture. Stir gently to combine all ingredients.
Tip: Using light corn syrup instead of sugar creates a smoother, more stable paste that won’t crystallize over time. However, granulated sugar works well if you prefer to avoid corn syrup.
Make sure all ingredients are thoroughly mixed before proceeding to the next step. The mixture should look somewhat grainy at this point, with the tiny black vanilla seeds evenly distributed throughout the liquid. Don’t worry if the sugar hasn’t fully dissolved yet—the heating process will take care of that.
Step 3: Heat the Mixture
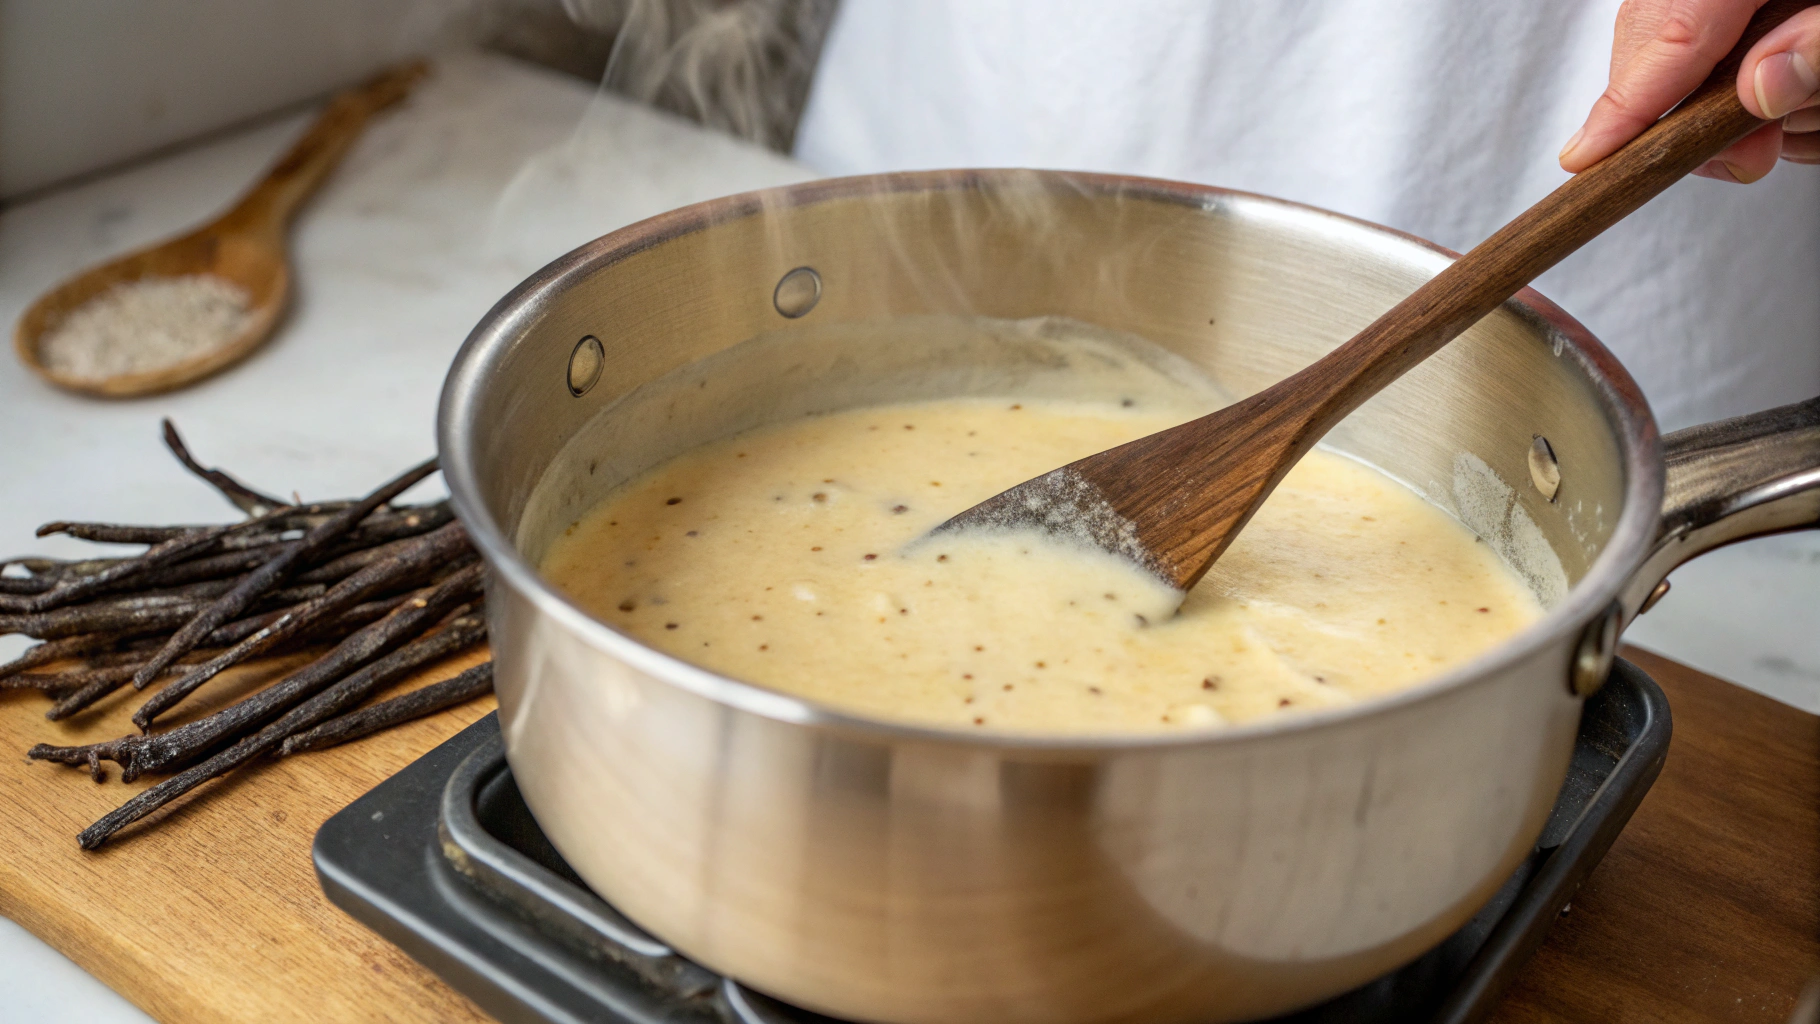
Heat the Mixture
Place the saucepan over low heat and warm the mixture gently. Do not allow it to boil or simmer vigorously, as high heat can damage the delicate vanilla flavor compounds. Stir occasionally until the sugar completely dissolves, about 5-7 minutes. The mixture should become slightly thicker but still pourable.
Tip: Patience is key here – keeping the heat low preserves the aromatic compounds in the vanilla that contribute to its complex flavor profile.
Watch the mixture carefully as it warms, looking for the sugar crystals to fully dissolve. You’ll notice the liquid becoming more translucent as this happens. The gentle warming process helps the vanilla beans release their flavors into the syrup mixture, creating a rich infusion that forms the foundation of your paste.
If you notice the mixture starting to bubble, immediately reduce the heat or briefly remove the pan from the burner. Remember that we’re creating an infusion rather than a reduction at this stage.
Step 4: Cool and Thicken
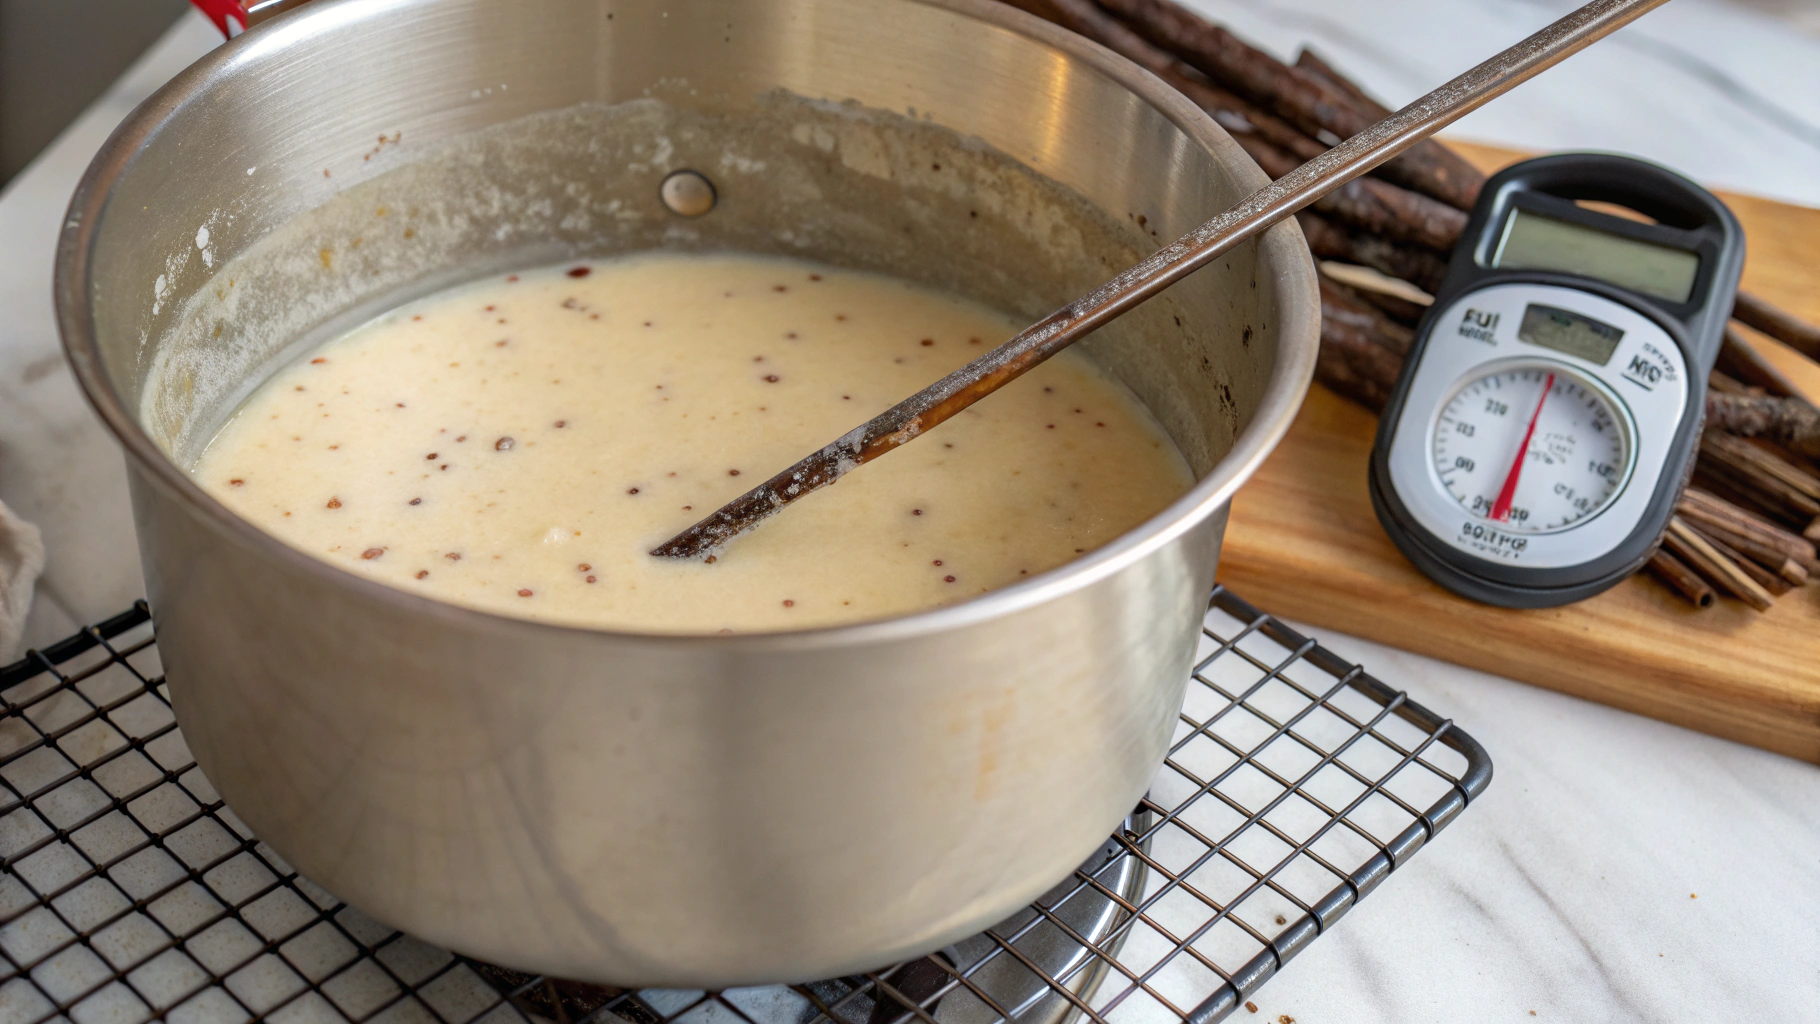
Cool and Thicken
After achieving that perfect syrupy consistency during the reduction phase, it’s time to let your vanilla paste develop its full character.
Remove the saucepan from heat and allow the mixture to cool to room temperature. During this cooling period, something magical happens—the paste will continue to thicken naturally, and the flavors will deepen as the vanilla pods release more of their aromatic compounds. Keep the vanilla pods in the mixture throughout this cooling process to extract maximum flavor.
Once completely cooled, your vanilla paste should have a consistency similar to maple syrup, with beautiful dark specks of vanilla bean distributed throughout the amber-colored base.
Troubleshooting Consistency:
-
Too thin? If your paste hasn’t reached the desired thickness after cooling, you can return it to low heat for another 3-5 minutes to reduce it further.
-
Too thick? If you find the paste too viscous to work with easily, add a teaspoon of vanilla extract and stir to incorporate—this will thin it slightly without diluting the flavor.
The cooling process typically takes about 1-2 hours, but you’ll be rewarded with a richly flavored paste that captures the essence of premium vanilla.
Step 5: Strain and Transfer
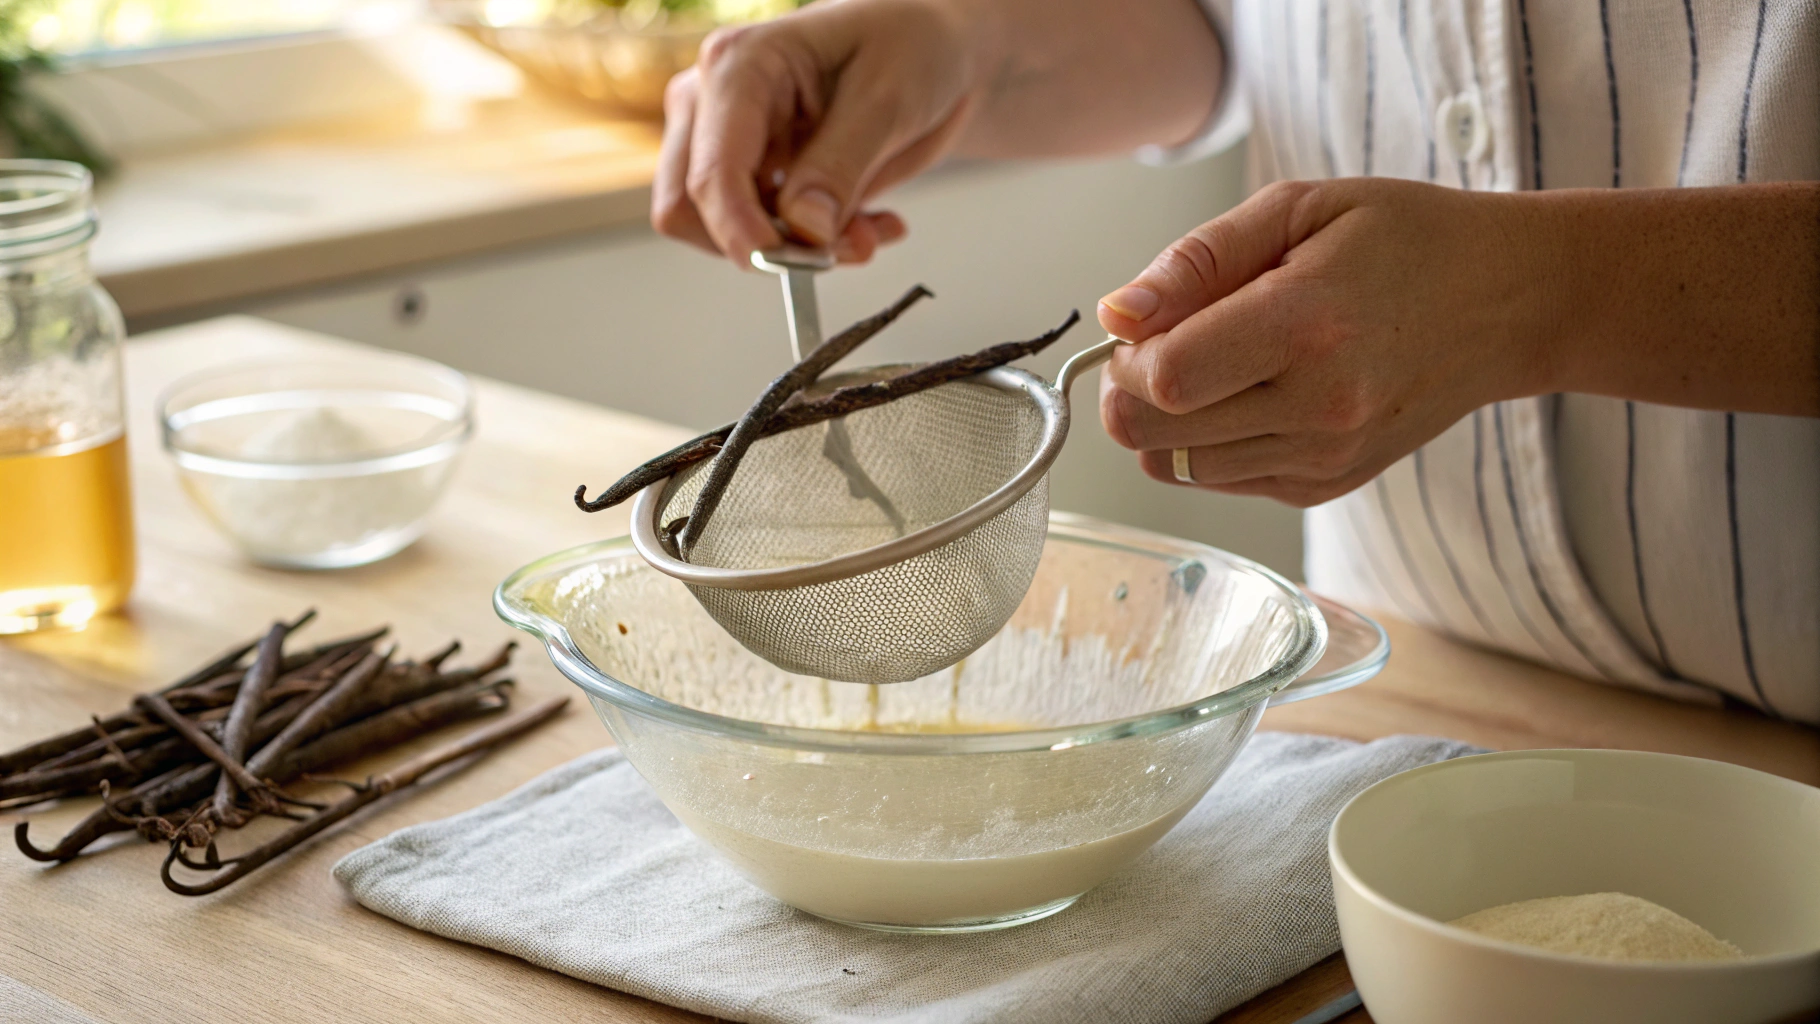
Strain and Transfer
Now that your vanilla paste has developed its rich flavor profile, it’s time to remove the solid components for a smoother consistency:
-
Prepare your straining setup: Place a fine-mesh strainer or a piece of cheesecloth over a clean bowl.
-
Strain thoroughly: Pour your vanilla mixture through the strainer, allowing the liquid to pass while catching the vanilla pod pieces.
-
Extract maximum flavor: Using the back of a spoon, gently press on the vanilla pods to ensure you’ve extracted every drop of that precious flavor.
-
Optional flavor boost: For an even more intense vanilla flavor, rinse the strained pods with a tablespoon of additional vanilla extract and add this liquid to your paste.
-
Transfer to storage: Once strained, transfer your vanilla paste to the sterilized jar or container you prepared earlier.
Pro Tip: Those used vanilla pods still hold tremendous value! Rather than discarding them, rinse them gently, allow them to dry completely, and repurpose them in one of these ways:
- Add to a jar of granulated sugar to create fragrant vanilla sugar for baking
- Place in a bottle of vodka to jumpstart another batch of homemade vanilla extract
- Bury them in brown sugar to infuse a delicate vanilla aroma
The strained paste should have a thick, syrupy consistency with visible vanilla seeds throughout—exactly what makes vanilla paste so prized in gourmet cooking.
Step 6: Store Properly
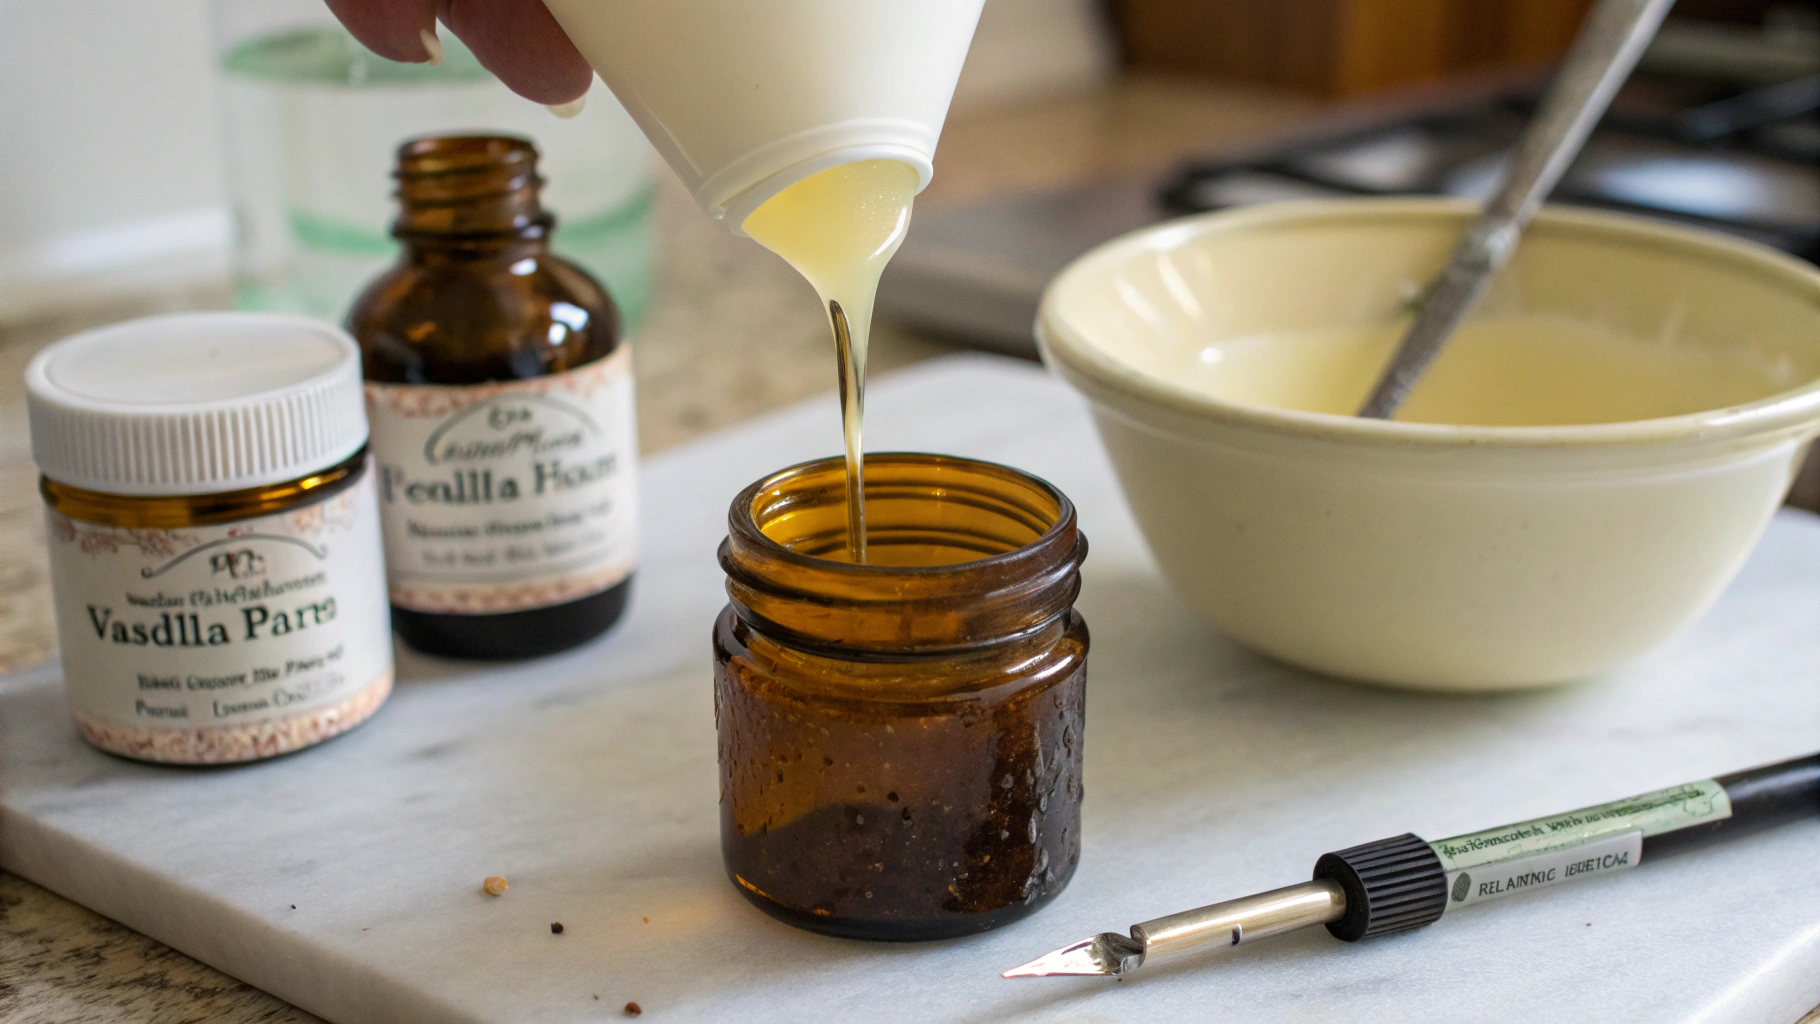
Store Properly
Preserving your homemade vanilla bean paste correctly ensures it maintains its potent flavor and aromatic qualities for months to come.
Transfer your finished vanilla bean paste to a clean glass jar with a tight-fitting lid. Be sure the jar is completely dry to prevent any moisture from causing mold growth. Label the jar with the date made so you can track its freshness.
Store in a cool, dark place like a pantry or cupboard away from direct heat and sunlight. The paste will maintain its best quality for up to 6 months when stored properly. For even longer shelf life, you can refrigerate the paste, which can extend its usability to approximately one year.
Tip: Amber or dark-colored glass jars help protect the vanilla paste from light exposure, which can degrade the flavor over time. If using a clear glass jar, store it inside a cabinet to protect from light.
Unlike commercial vanilla extracts with their high alcohol content, homemade vanilla paste may have a shorter shelf life, but the tradeoff is an intensely flavored product free from preservatives and additives.
Vanilla Paste Uses
This versatile ingredient enhances numerous recipes:
- Baking with Vanilla Paste: Perfect for cookies, cakes, and pastries
- Vanilla Cream: Adds depth to custards, ice cream, and whipped cream
- Vanilla Frosting Recipe: Creates visually appealing frostings with bean specks
- Beverages: Elevates coffee, tea, smoothies, and cocktails
- Savory dishes: Adds complexity to sauces for seafood or poultry
Substitute for Vanilla Paste
If you don’t have vanilla paste on hand, you can substitute:
- Equal amount of vanilla extract (minus the visual appeal)
- 1/2 a vanilla bean, scraped, per teaspoon of paste needed
- 1 tablespoon vanilla powder per teaspoon of paste
Storage and Shelf Life
Store your homemade vanilla paste in an airtight container in a cool, dark place. When properly stored, it can last up to:
- 6-9 months at room temperature
- 12+ months if refrigerated
The alcohol content helps preserve it naturally, though the flavor may intensify over time.
Variations
Alcohol-Free Version:
Substitute the vanilla extract with vanilla-infused glycerin for an alcohol-free alternative.
Honey-Sweetened Paste:
Replace sugar with equal parts raw honey for a different flavor profile.
Vanilla Bean Varieties:
Experiment with different vanilla bean varieties:
- Madagascar beans for classic, rich flavor
- Tahitian beans for floral, fruity notes
- Mexican beans for a bolder, spicier character
Where to Buy Vanilla Paste
If making your own seems daunting, quality vanilla paste can be purchased from:
- Specialty baking stores
- Gourmet food shops
- Online retailers specializing in baking ingredients
- Some well-stocked supermarkets in the baking section
However, the homemade version is significantly more economical, especially if you bake frequently.
Nutritional Information
Per teaspoon serving (approximate):
- Calories: 15-20
- Carbohydrates: 3-4g
- Sugar: 3g
- Protein: 0g
- Fat: 0g
Note: Values may vary based on exact ingredients used.